Course · 2024
Gesture-based Presentation Remote
A camera-based remote that lets instructors switch slides with a hand gesture, for the days the clicker gets left behind.
Summary
- Role
- Designer and developer Hardware setup and gesture software
- Context
- CSCI 5127W: Embodied Computing: Design and Prototyping Graduate course, University of Minnesota
- Format
- Prototype built on Raspberry Pi
- Designed for
- Instructors presenting slides
- Recognition
- Class Favorite Voted Top 3 of the coolest ideas in class
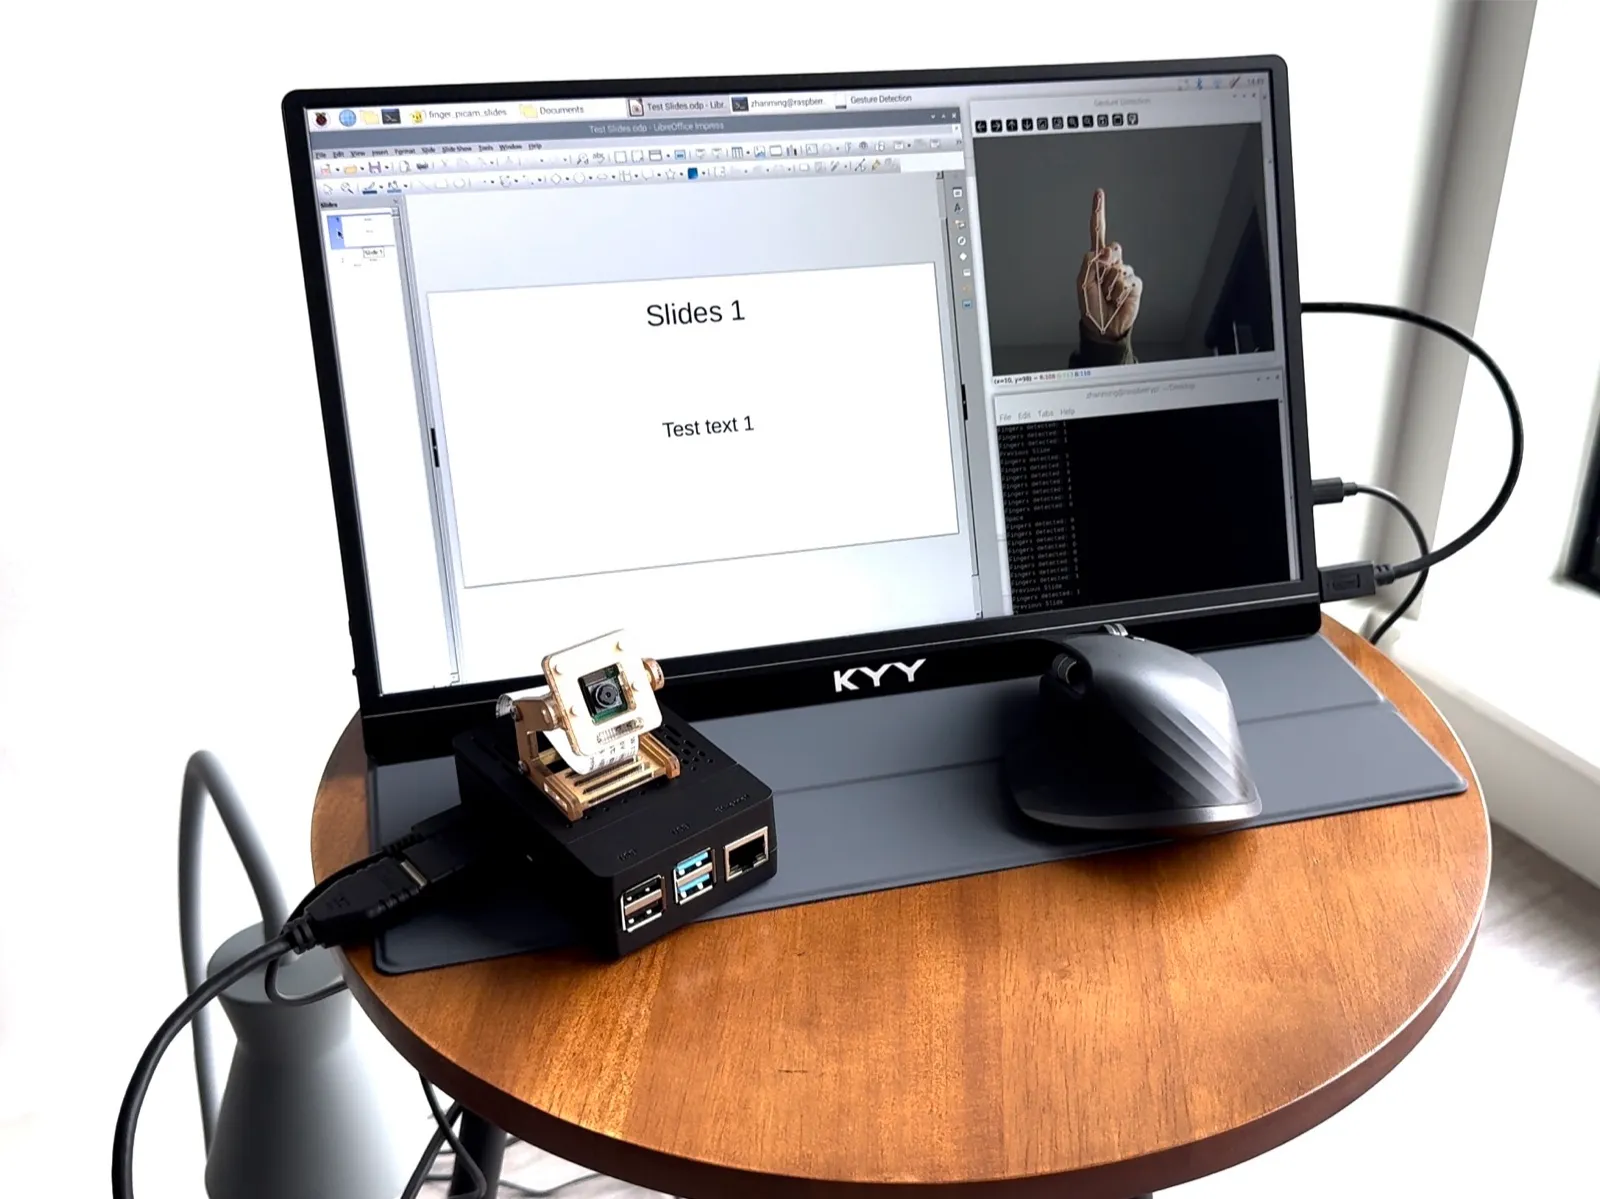
This project is for a graduate-level course at the University of Minnesota, CSCI 5127W: Embodied Computing: Design and Prototyping. It is a gesture-based presentation remote built on Raspberry Pi. The prototype was voted as the Top 3 of the coolest ideas in class.
Demonstration Video
Summary
- Role
- Designer and developer Hardware setup and gesture software
- Context
- CSCI 5127W: Embodied Computing: Design and Prototyping Graduate course, University of Minnesota
- Format
- Prototype built on Raspberry Pi
- Designed for
- Instructors presenting slides
- Recognition
- Class Favorite Voted Top 3 of the coolest ideas in class
Introduction & Background
Just imagine how we interacted with technology before we had computers and smartphones. Around three decades ago, most of us just used our bare hands to interact with the handles or the other parts of machines when interacting with them. The gesture-based movements are direct, natural, and easy to understand. However, things completely changed after the engineers introduced input devices like keyboards and pointers, pushing us to a WIMP-based interaction (windows, icons, menus, and pointers) era.
Nowadays, the development of computer vision algorithms and sensors facilitates gesture-based interfaces. Gesture-based interaction is broadly studied in Human-computer Interaction (HCI). Gesture-based interfaces translate gestures into commands. These interfaces distinguish successive body movements of the user and translate body parts such as hands, fingers, face, and head into a discrete sequence of computer commands. Compared to WIMP-based interactions (windows, icons, menus, and pointers), mid-air gesture-based interaction is considered more intuitive, easier to learn, and easier to memorize.
Following the previous work on applying gesture-based interfaces in teaching and public speaking, this project is about building a gesture-based interface for switching slide pages on Raspberry Pi. It is motivated by my personal experiences. During Fall 2024, I worked as a graduate instructor at the U, and sometimes forgot to bring the remote controller for the slides with me. I have always looked forward to a system integrated into the lecture desk that could detect my gestures and help me switch the pages of my slides.
Material List
It would help if you considered preparing the following hardware materials and software to implement this project.
Hardware
- Raspberry Pi 4 Model B [ Amazon (opens in a new tab) ]
- Raspberry Pi 15W USB-C Power [ Amazon (opens in a new tab) ]
- Raspberry Pi Camera Module V2-8 [ Amazon (opens in a new tab) ]
- Micro SD Card (32 GB) [ Amazon (opens in a new tab) ]
- Monitor (for testing) [ Amazon (opens in a new tab) ]
- Micro HDMI to (mini) HDMI cable [ Amazon (opens in a new tab) ]
- Note: Raspberry Pi 4 Model B has two micro HDMI ports. You could choose the cable types based on your monitor’s HDMI port.
- Alternative: You could purchase the HDMI to HDMI cable and HDMI to micro HDMI adapters.
- Wired/Wireless Keyboard
- (Optional) Wired/Wireless mouse
- (Optional) A laptop
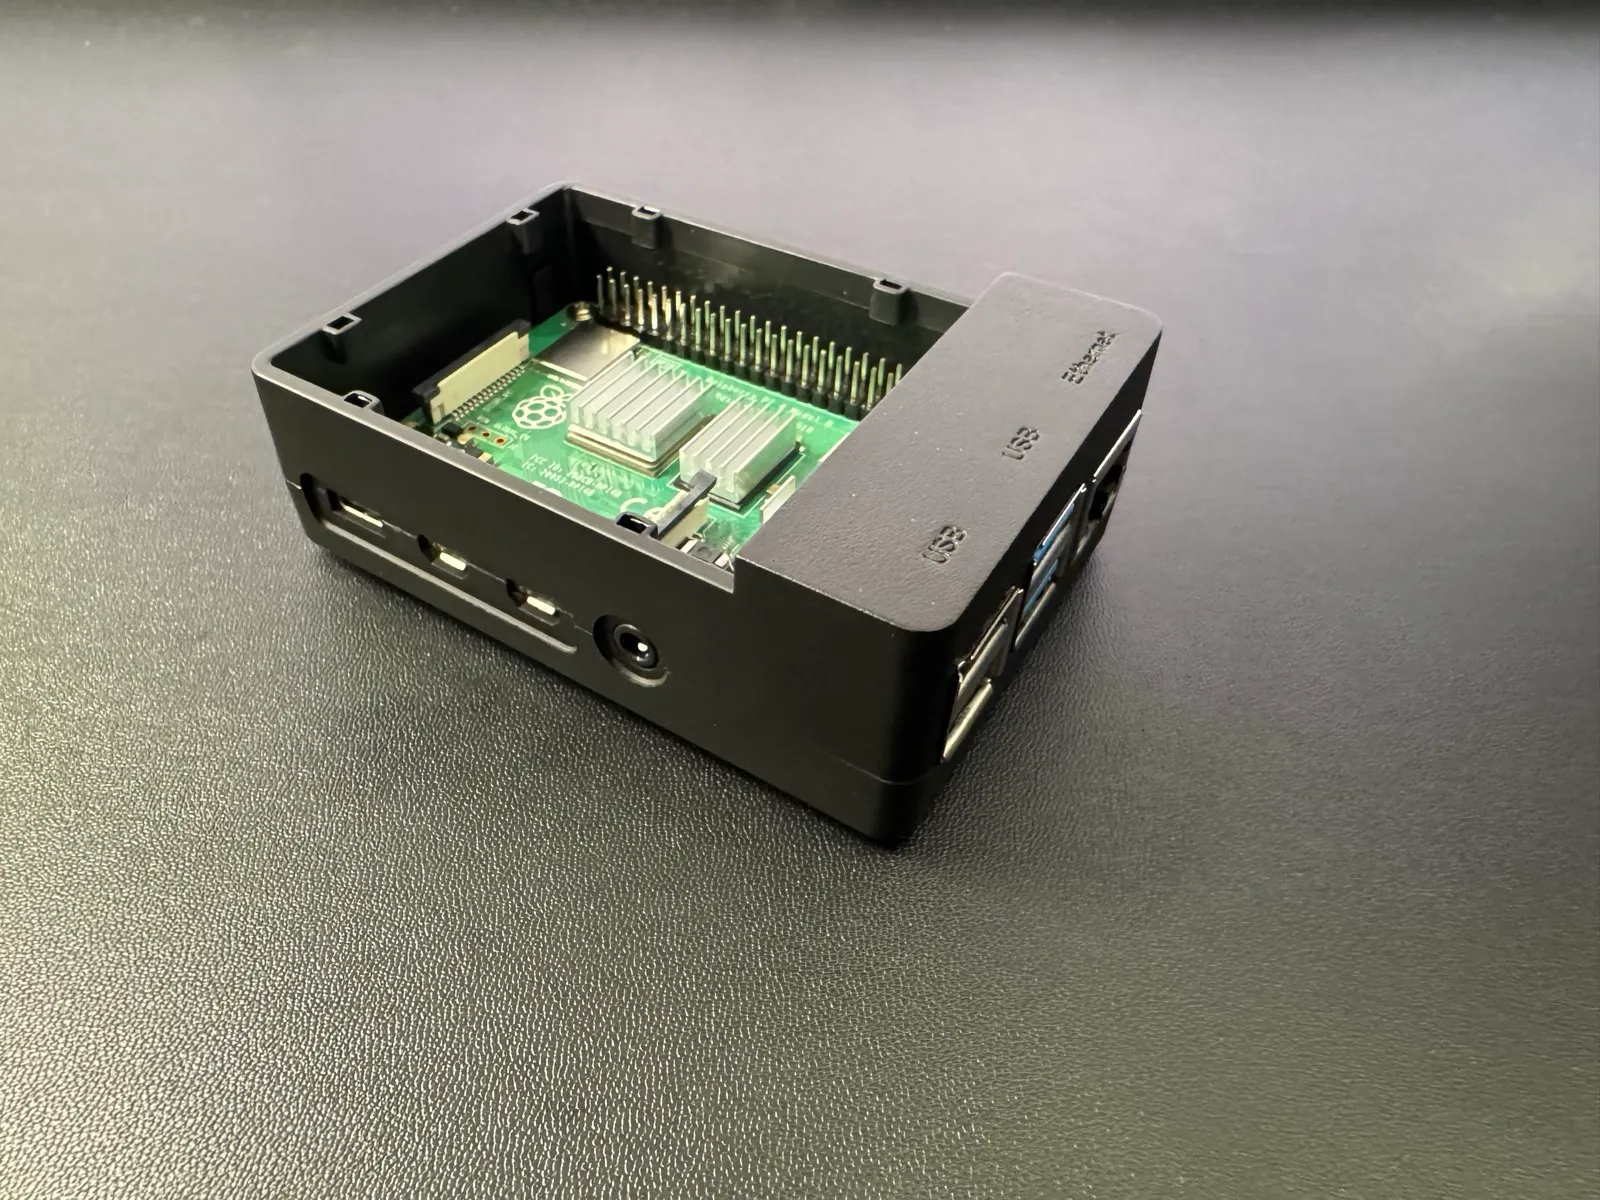
- (Optional) Raspberry Pi 4 Model B Case [ Amazon (opens in a new tab) ]
- (Optional) Raspberry Pi Camera Module Stand [ Amazon (opens in a new tab) ]
Software
Hardware Configuration
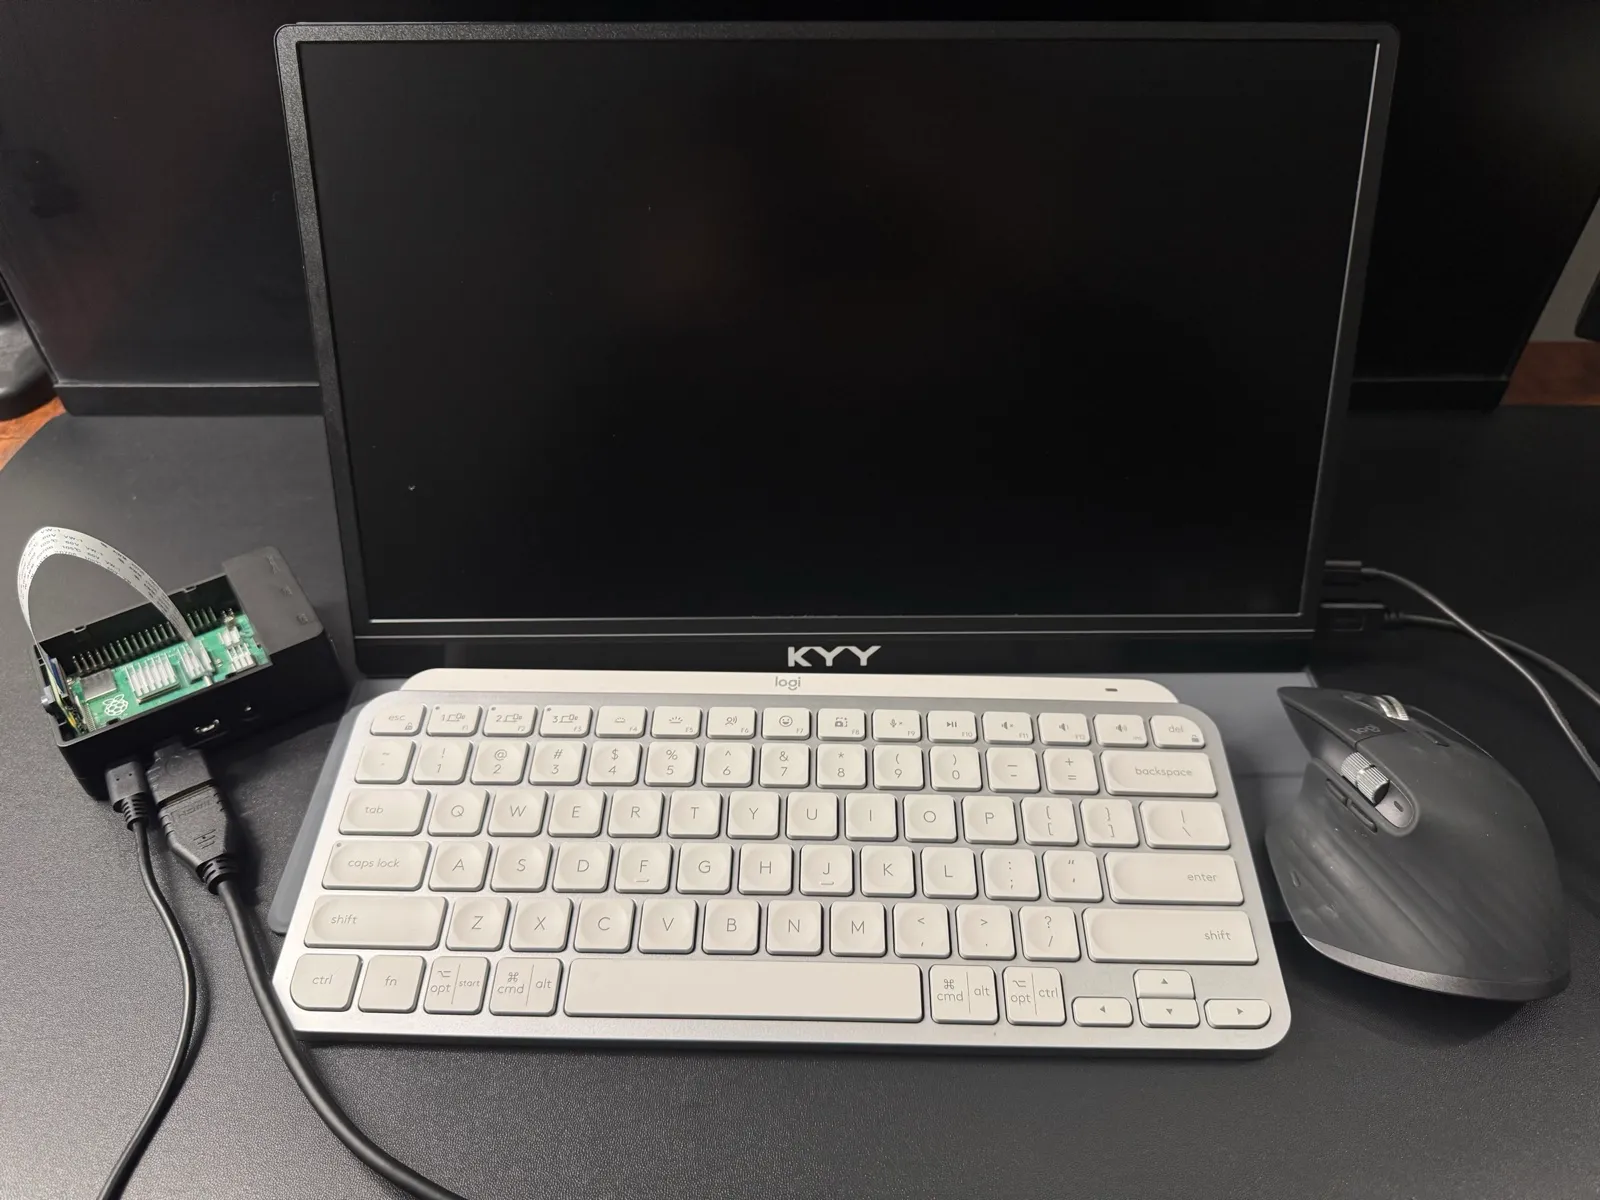
Connect Raspberry Pi Camera Module
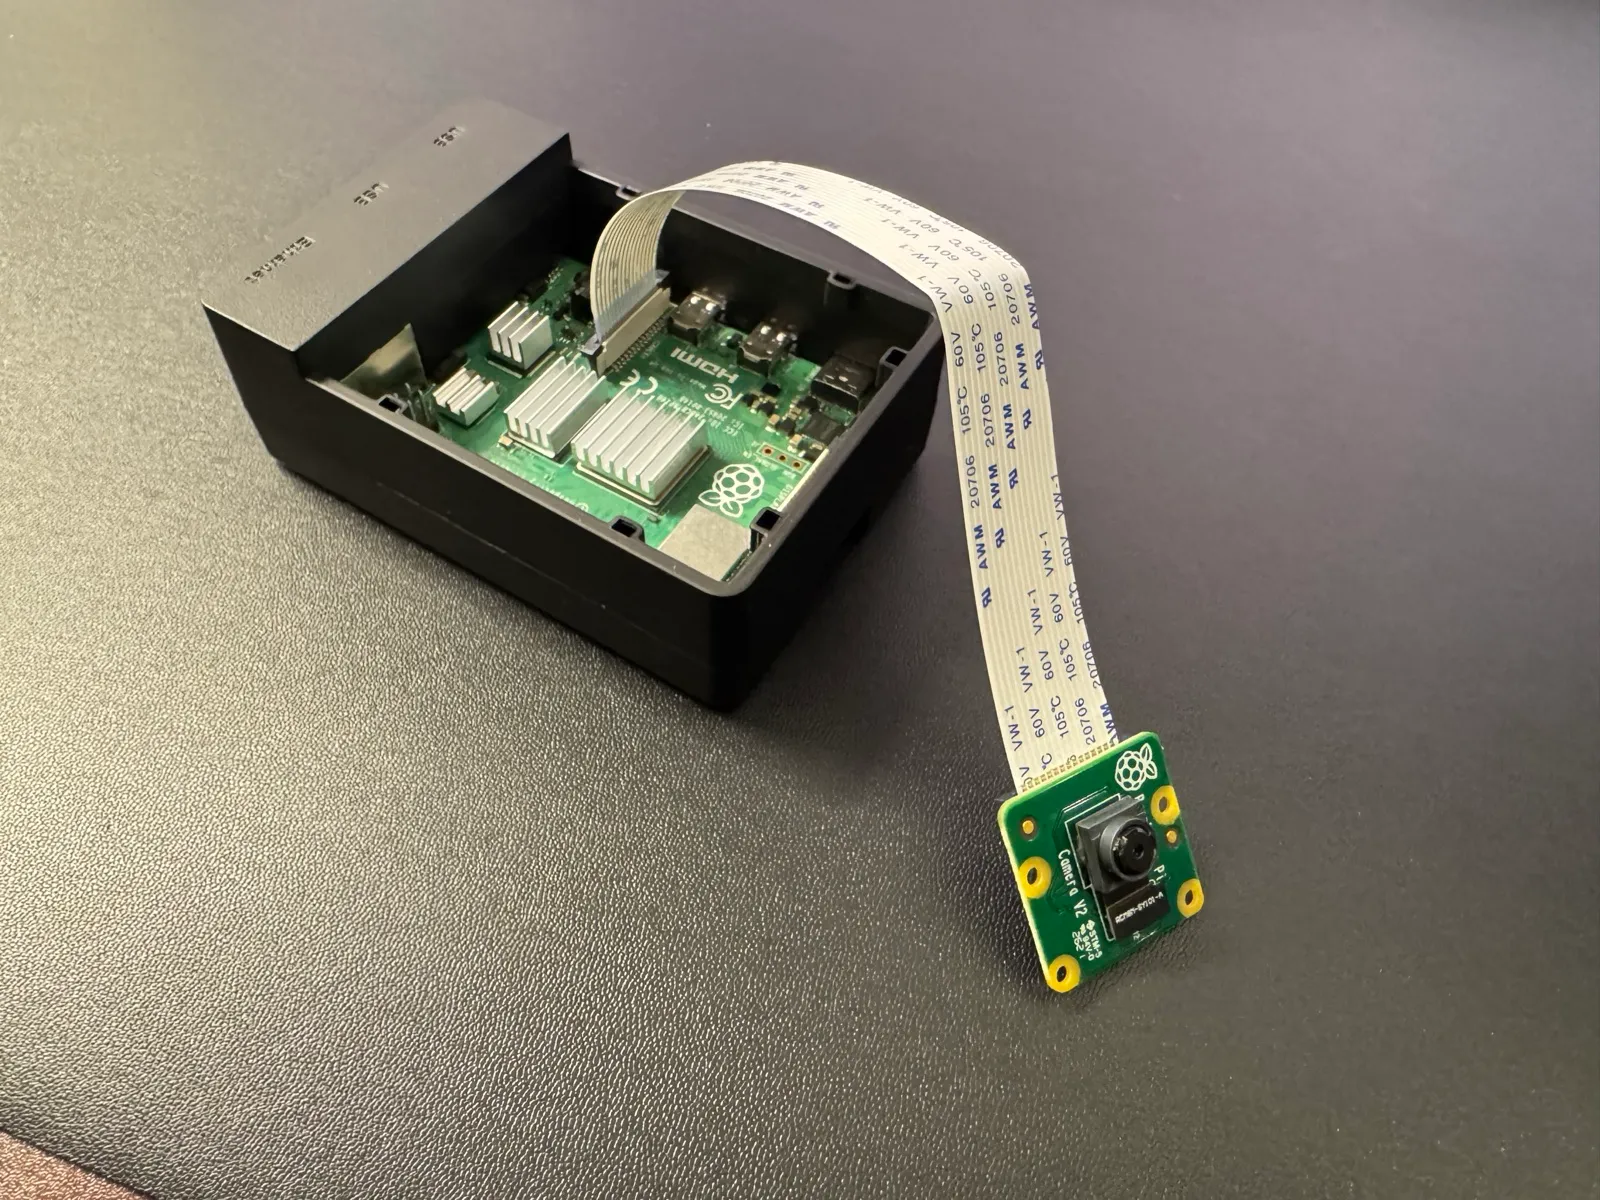
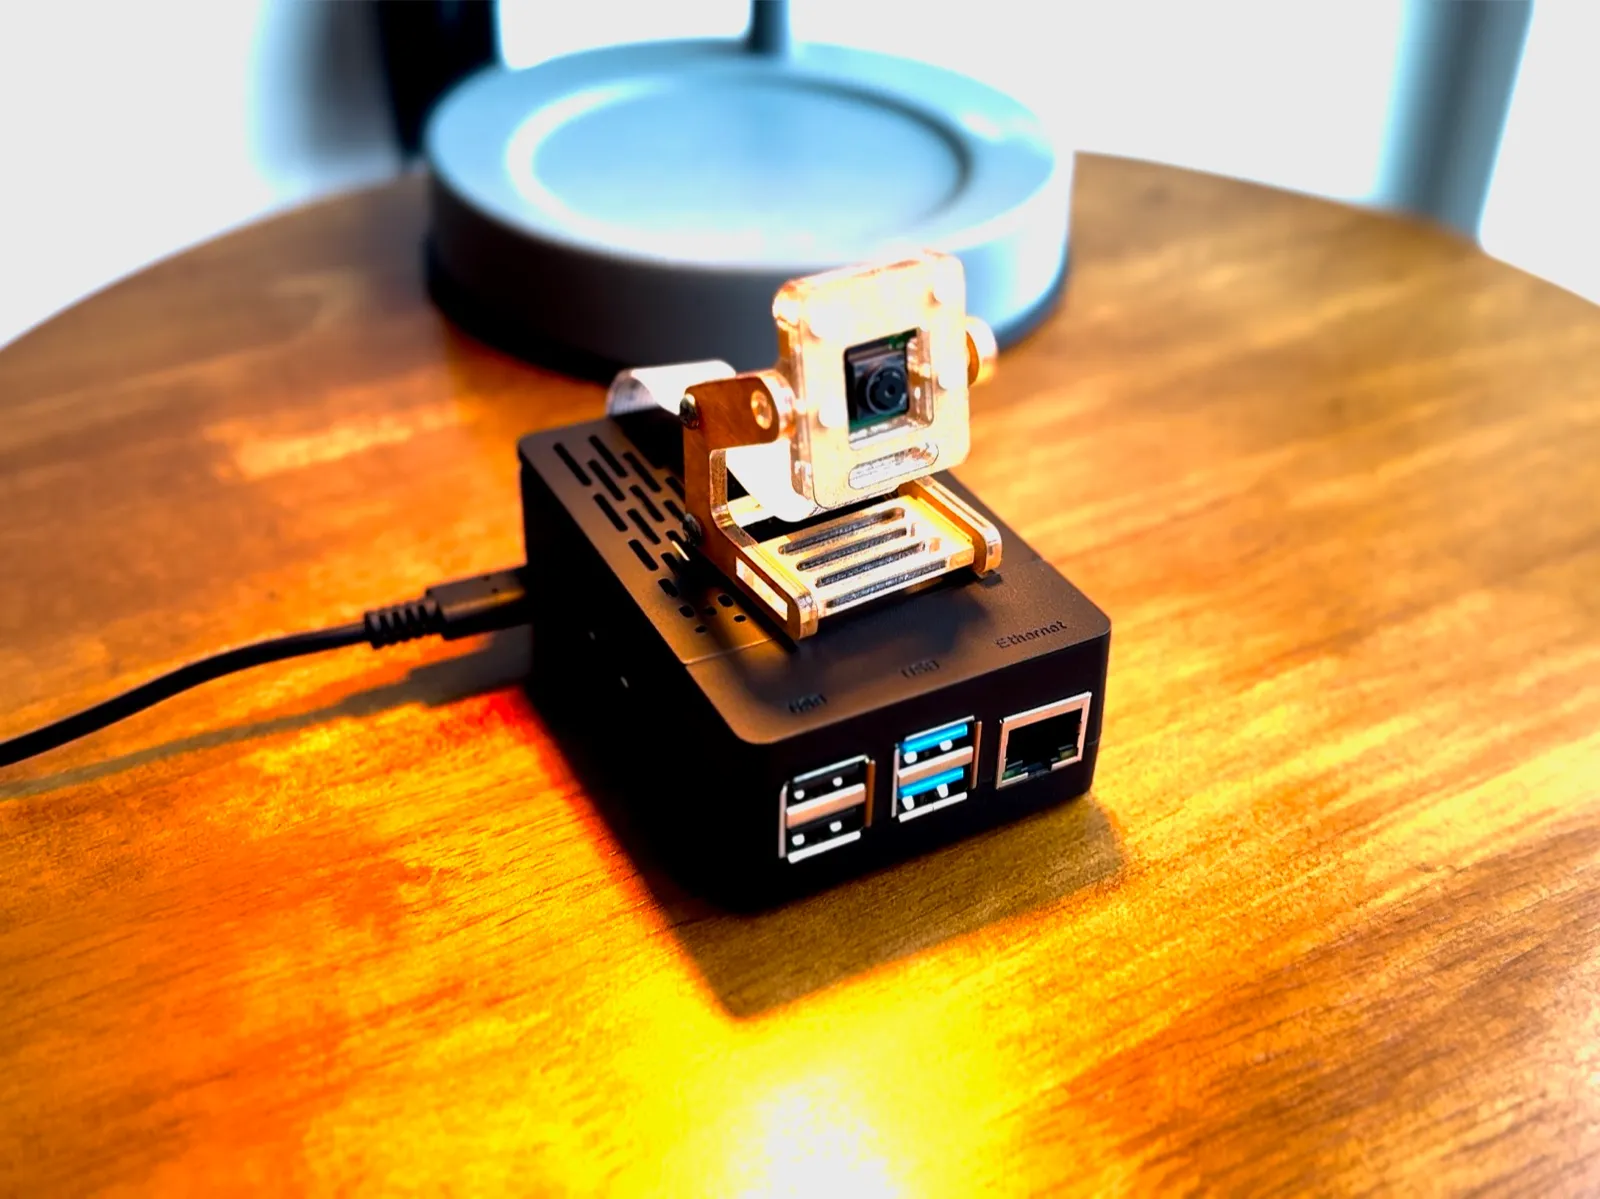
When power is not connected, plug the camera’s soft cable into the Raspberry Pi camera port, the connector between the USB and micro HDMI ports. The connector has a black plastic cover, which can be opened by gently lifting both sides of the cover upwards. The gold-colored connector of the cable should face the micro HDMI port, and the blue part of the cable should face the USB port on the Raspberry Pi. Lastly, close the black lid by gently pressing down on it. An optional stand is used to hold the camera in place, thereby improving the accuracy of the gesture recognition. In the handheld condition, the recognition algorithm sometimes interrupts due to the shaky image, and the accuracy of determining the left and right movement of the hand is not satisfactory.
Connect All the Cables
Connect the power to the Raspberry Pi, then connect the Raspberry Pi to the test screen using the HDMI cable and connect the power to the test screen.
Note: Before connecting the power wire to the Raspberry Pi, please first follow the “Install Raspberry Pi OS” section below to install Raspberry Pi OS, and plug in the Micro SD Card.
Software Programming
Install Raspberry Pi OS
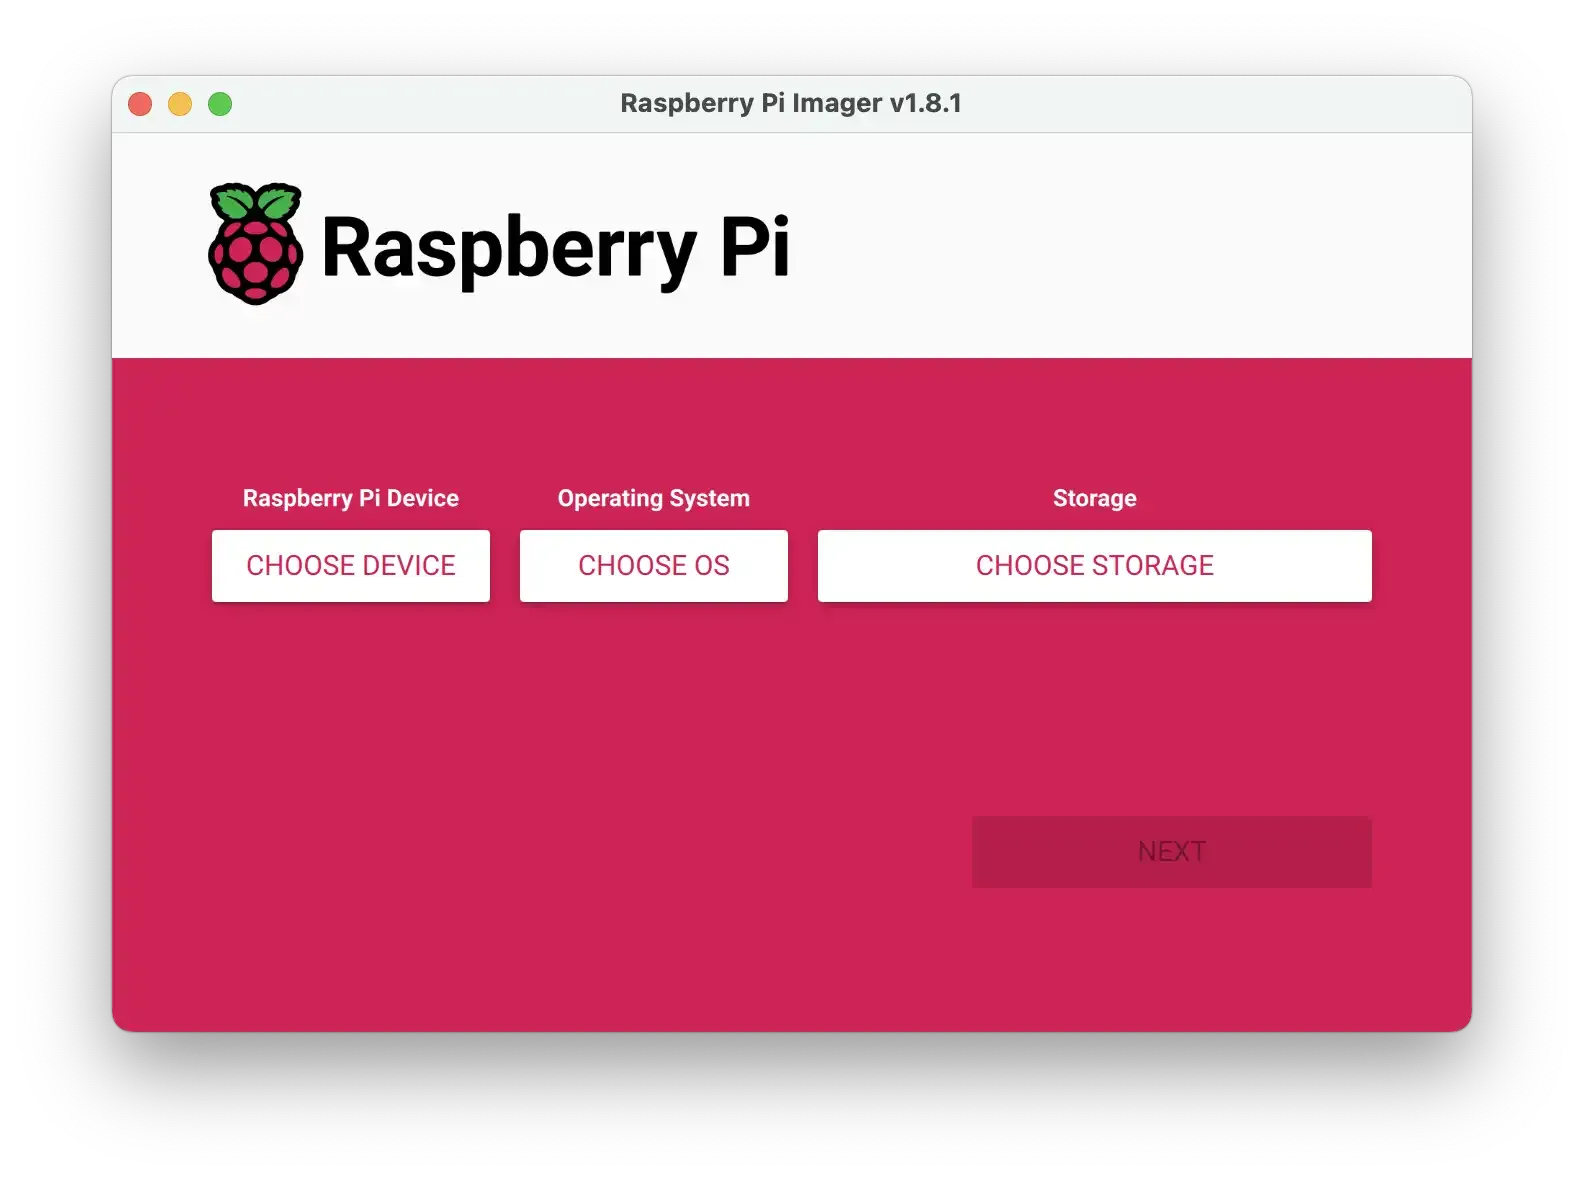
Follow the guide and install Raspberry Pi OS (opens in a new tab). Start by downloading Raspberry Pi Imager, then connect the microSD card to your laptop and run the Imager program. Select the device, operating system, and location of the SD card, respectively, and click Next. Once the installation is complete, insert the microSD card into the slot on the bottom of the Raspberry Pi.
Note: Before connecting the power wire to the Raspberry Pi, please firstly install Raspberry Pi OS and plug in the Micro SD Card.
After powering up the Raspberry Pi, first connect the keyboard and mouse. When using a wireless keyboard and mouse, set the devices to Bluetooth discoverable mode and the Raspberry Pi will automatically start connecting. Then, follow the steps on the screen to fill in the account number, password, and time zone, respectively, and set up the wireless network. Allow the Raspberry Pi to update the system and applications, or manually update them in the terminal using the codes below.
sudo apt-get update
sudo apt-get upgrade
Install LibreOffice for Raspberry Pi
Follow the guide and install LibreOffice for Raspberry Pi (opens in a new tab). Open the terminal and paste the codes below.
sudo apt-get install libreofficeYou can open LibreOffice by clicking the menu button at the top-left corner, and several apps will be shown in the “Office” panel. In this project, you will use the “LibreOffice Impress” app. Click on and open it. It is similar to Microsoft PowerPoint. Create 2-3 test slide pages by adding some random texts.
Recognizing Gestures Using Computer Vision Algorithms
For the gesture recognition part, four modules should be installed on Raspberry Pi: cv2, mediapipe, pyautogui, and picamera. Open the terminal and paste the codes below, one line at a time.
pip install opencv-python --break-system-packages
pip install mediapipe --break-system-packages
pip install pyautogui --break-system-packages
pip install picamera --break-system-packages
Now, you can create a new file in the Desktop folder of Raspberry Pi with the format filename.py, and paste the codes below. The codes are generated using ChatGPT, checked by referring to tutorials, and validated by testing.
import cv2
import mediapipe as mp
import pyautogui
from picamera2 import Picamera2
import time

# Initialize Mediapipe hands and drawing utilities
mp_drawing = mp.solutions.drawing_utils
mp_hands = mp.solutions.hands

# Initialize Picamera2
picam2 = Picamera2()
config = picam2.create_preview_configuration(main={"size": (640, 480)})
picam2.configure(config)
picam2.start()

# Allow the camera to warm up
time.sleep(2)

# Function to detect finger positions
tipIds = [4, 8, 12, 16, 20]
state = None

def fingerPosition(image, handNo=0):
    lmList = []
    if results.multi_hand_landmarks:
        myHand = results.multi_hand_landmarks[handNo]
        for id, lm in enumerate(myHand.landmark):
            h, w, c = image.shape
            cx, cy = int(lm.x * w), int(lm.y * h)
            lmList.append([id, cx, cy])
    return lmList

# Initialize Mediapipe Hands model
with mp_hands.Hands(
        min_detection_confidence=0.8,
        min_tracking_confidence=0.5) as hands:

    while True:
        # Capture frame from the Picamera2
        frame = picam2.capture_array()

        # Flip the image horizontally for a later selfie-view display
        image = cv2.flip(frame, 1)

        # Convert the BGR image to RGB for Mediapipe processing
        image_rgb = cv2.cvtColor(image, cv2.COLOR_BGR2RGB)
        results = hands.process(image_rgb)

        # If hand landmarks are detected
        if results.multi_hand_landmarks:
            for hand_landmarks in results.multi_hand_landmarks:
                mp_drawing.draw_landmarks(image, hand_landmarks, mp_hands.HAND_CONNECTIONS)

            lmList = fingerPosition(image)

            if len(lmList) != 0:
                fingers = []
                for id in range(1, 5):
                    if lmList[tipIds[id]][2] < lmList[tipIds[id] - 2][2]:
                        fingers.append(1)
                    else:
                        fingers.append(0)

                totalFingers = fingers.count(1)
                print(f"Fingers detected: {totalFingers}")

                if totalFingers == 1:
                    if lmList[8][1] < 300:
                        pyautogui.press('left')
                        print("PreSlide")
                    elif lmList[8][1] > 400:
                        pyautogui.press('Right')
                        print("NextSlide")

        # Display the image
        cv2.imshow("Gesture Detection", image)

        # Break if 'q' is pressed
        if cv2.waitKey(1) & 0xFF == ord('q'):
            break

# Cleanup
cv2.destroyAllWindows()
picam2.close() You can test the codes by opening the terminal and pasting the following codes.
cd Desktop/
python3 filename.py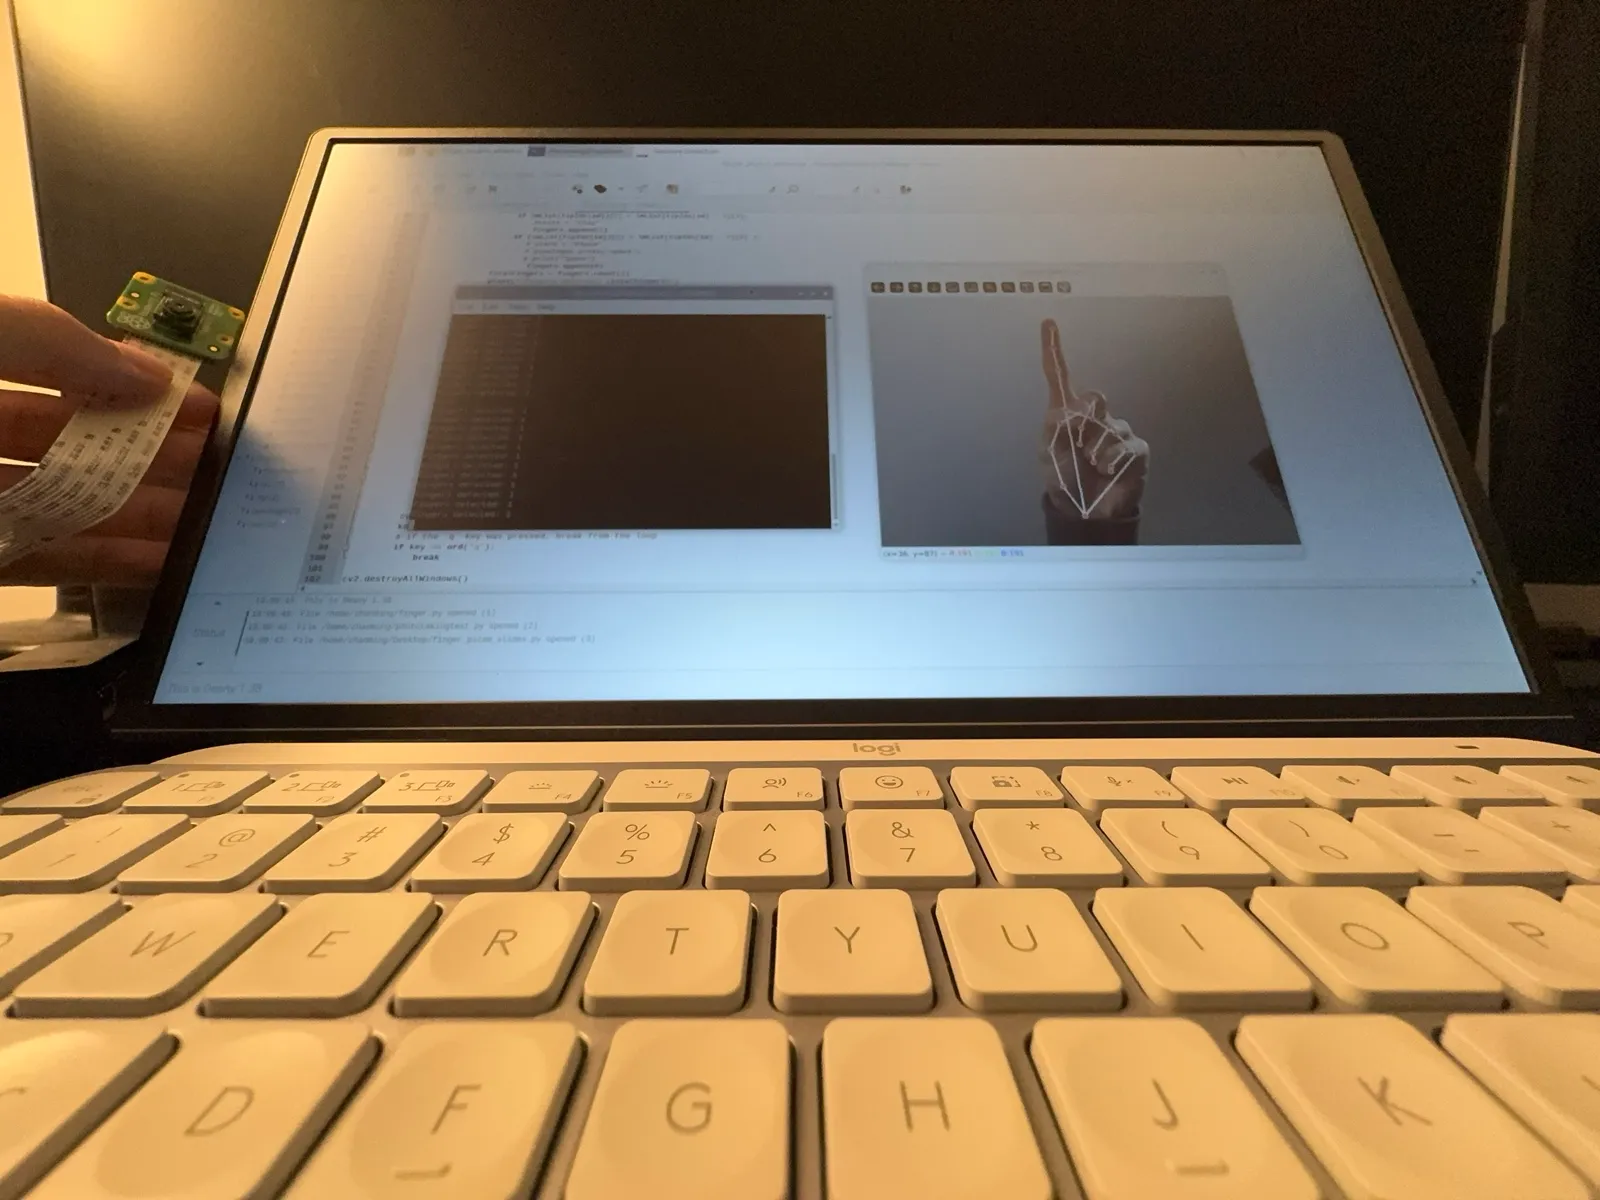
Features Demonstration
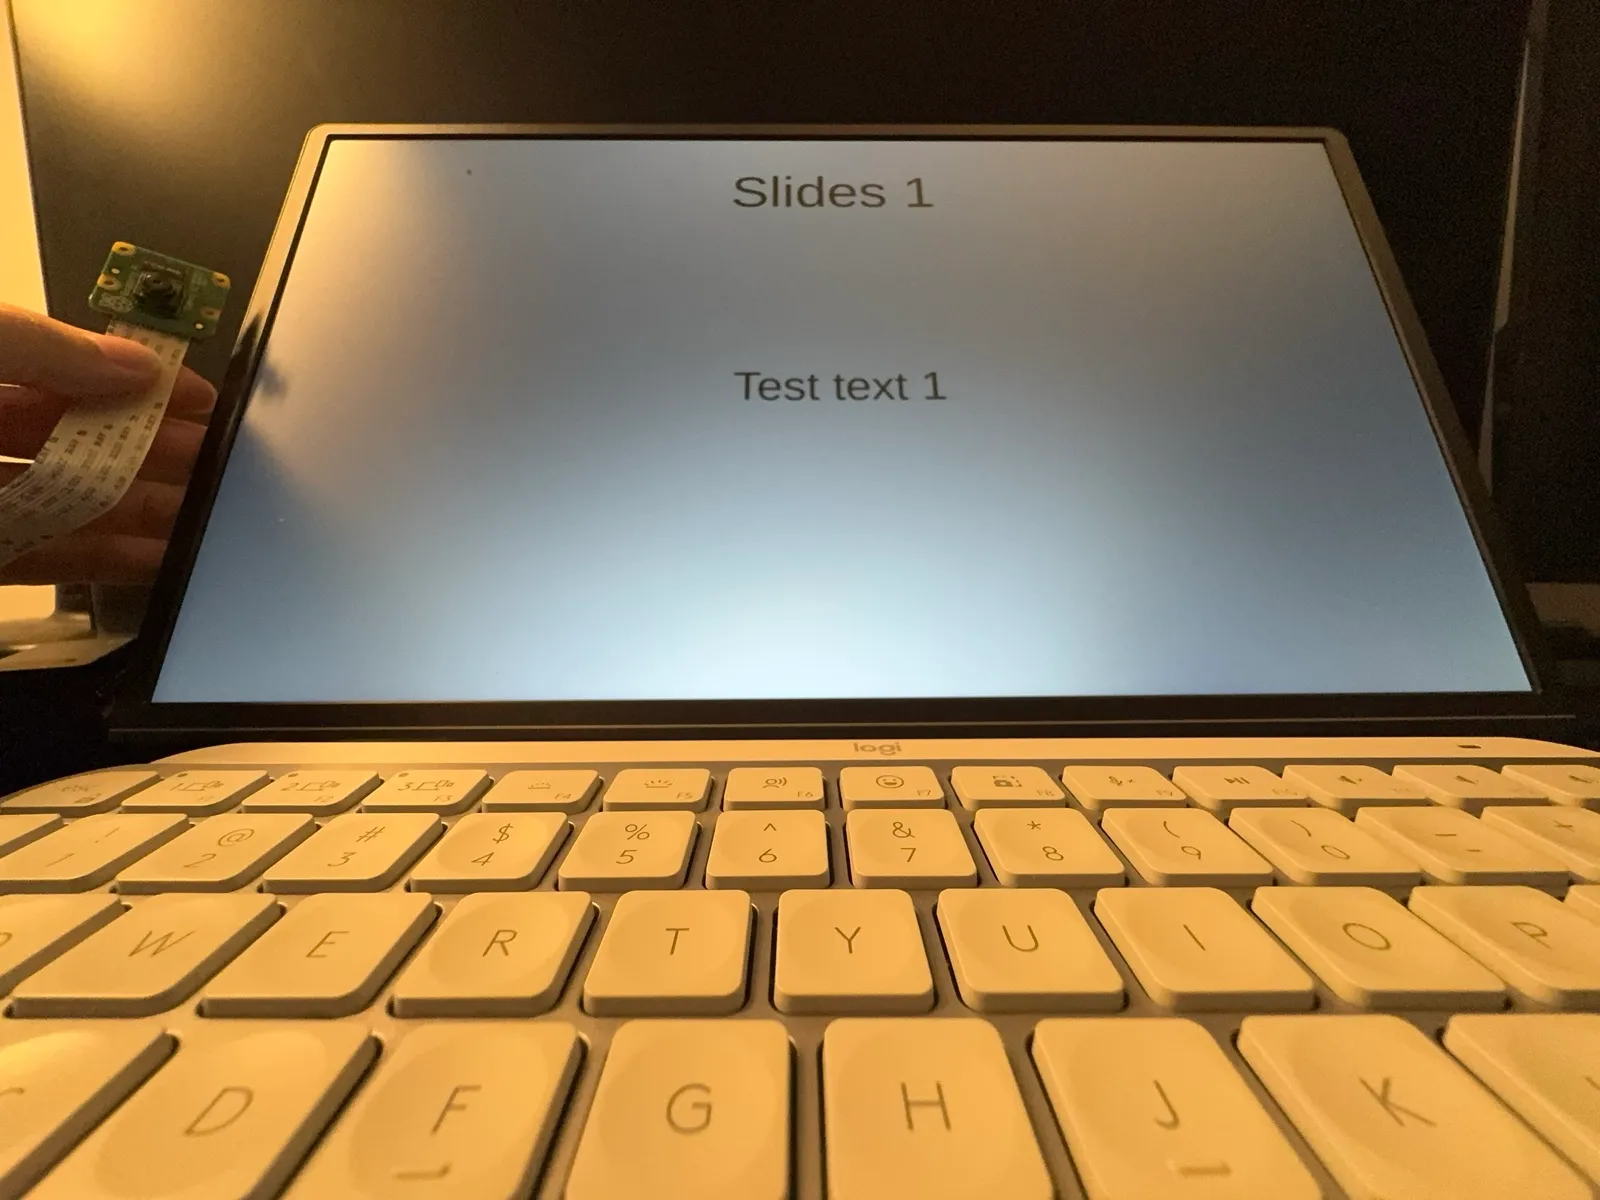
Voilà! Now you are all set. Keep the python file running and open the test slides. Enter the presentation mode and make sure the slides window is focused. With your index finger pointing up, you can switch to the next page by moving your hand to the right or switch to the previous page by moving your hand to the left.
Moving forward, I plan to add more gesture commands such as exit presentation and return to home page.
See also the Medium post (opens in a new tab).
Colophon
- Credits
-
- Zhanming Chen
- Date
- November 2024
- Tools
-
- Raspberry Pi 4 Model B
- Raspberry Pi Camera Module V2
- Python
- OpenCV (cv2)
- MediaPipe
- PyAutoGUI
- Picamera2
- Raspberry Pi OS
- LibreOffice Impress
- Features
-
- Index finger up, hand moves right: next slide
- Index finger up, hand moves left: previous slide
 Next project, number 3 of 6: Project A | 天使计划 A dashboard that maps social welfare data for people with disabilities across China's provinces, to help decision makers set priorities. Open project